
Conversions
Define and validate the business outcomes that Incendium should measure.
Updated 9 August 2026Where conversion setup lives
Incendium separates the reusable outcome from the website action that creates it. The Conversions page holds the name, classification and Location assignments. The actual trigger is trained inside a Location under Tag Your Location → Conversions.
Create or confirm the relevant Locations first. You can then define an outcome once and attach it to every Location where that action can happen, rather than creating separate copies for each page template.
After creating a Conversion or Interaction, open each attached Location and add the click, engagement or other trigger that identifies the action on that page.
Choose Conversion or Interaction
Use for a primary business outcome such as a sale, booking, registration or qualified enquiry.
Use for a meaningful step that shows intent without completing the main goal, such as opening a gallery, reading reviews or selecting a key link.
This distinction keeps low-value clicks from being treated like business outcomes. A smaller, clearer signal set makes journey analysis and attribution more useful, and provides advertising platforms with better-defined events when those signals are shared.
Create and assign the outcome
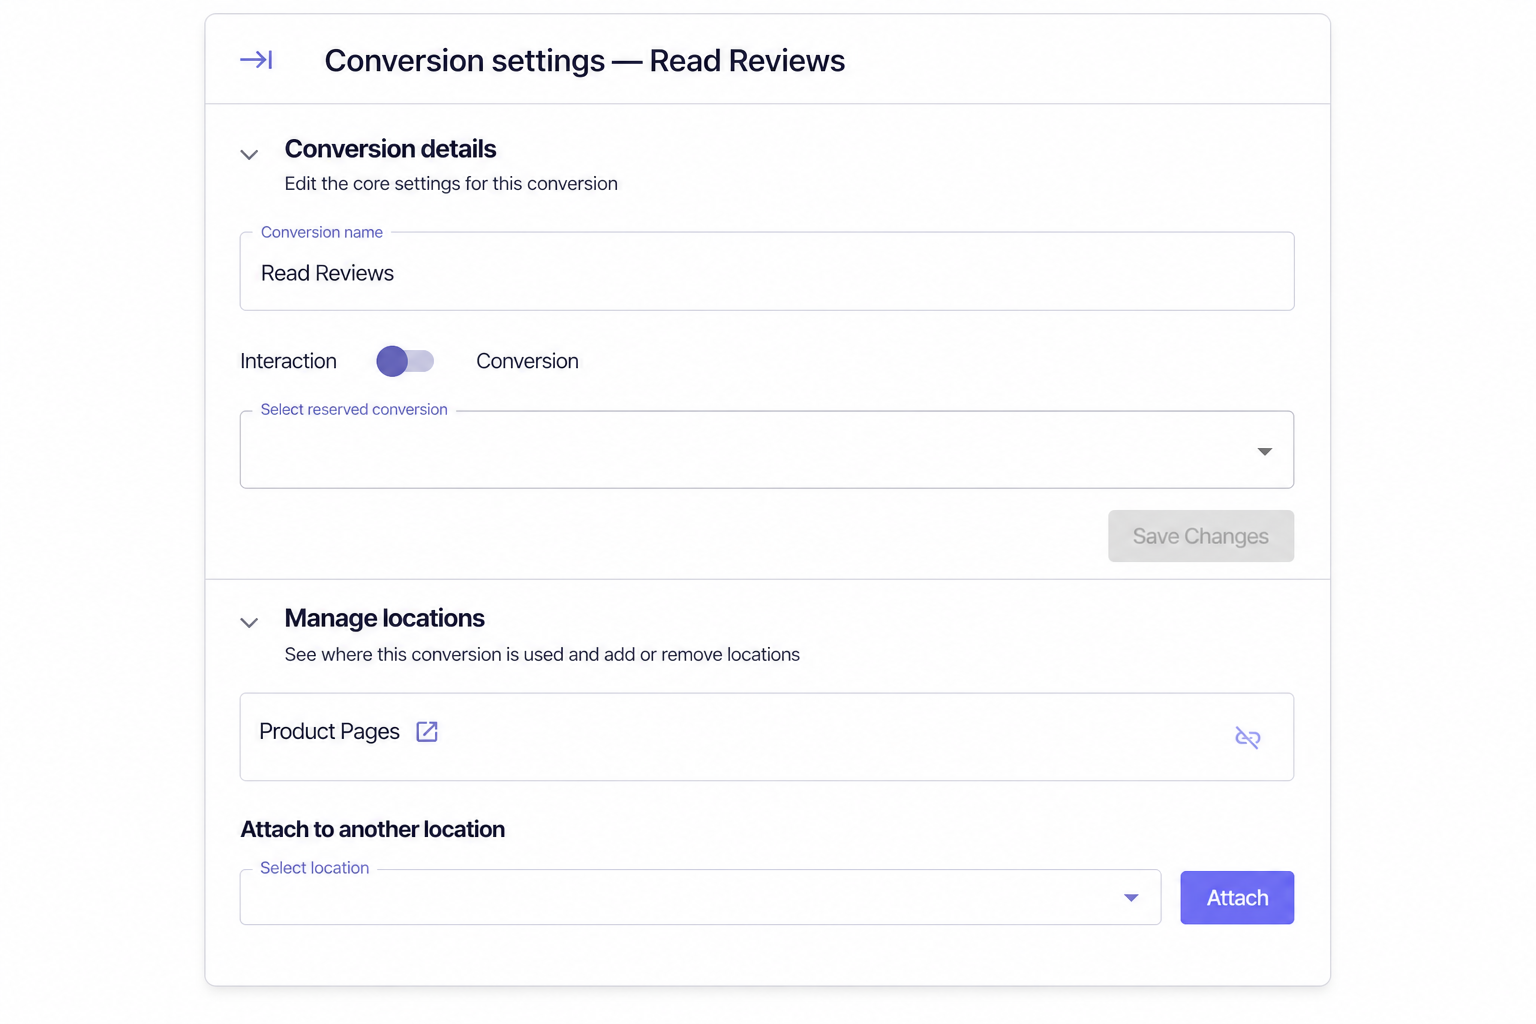
Name the outcome
Use a short name that describes what the visitor did. Avoid naming it after a selector, button colour or temporary campaign.
Set its type
Choose Conversion for a primary outcome or Interaction for a meaningful supporting action.
Select a Reserved Conversion when appropriate
Reserved values give recognised outcomes a consistent meaning across setup and reporting. Only choose one when the action genuinely represents that outcome.
Manage Locations
Attach the definition to another Location, remove an assignment, or use the link beside an attached Location to open its tagging setup.
Review automatic ecommerce outcomes first
Ecommerce projects can already include system outcomes such as Sale, Checkout, Add to basket, Cart viewed, Payment info submitted and Shipping info submitted. Some system defaults cannot be deleted.
Review the Conversions list before adding a new definition. Duplicating an automatic ecommerce event can inflate counts and send the same outcome more than once. Create additional definitions for site-specific actions that the automatic setup does not cover.
The Last Fired column helps identify definitions that are unused or may have stopped working. A blank value means no firing has been observed in the available history; it does not prove that the underlying page has received traffic.
Train the action inside a Location
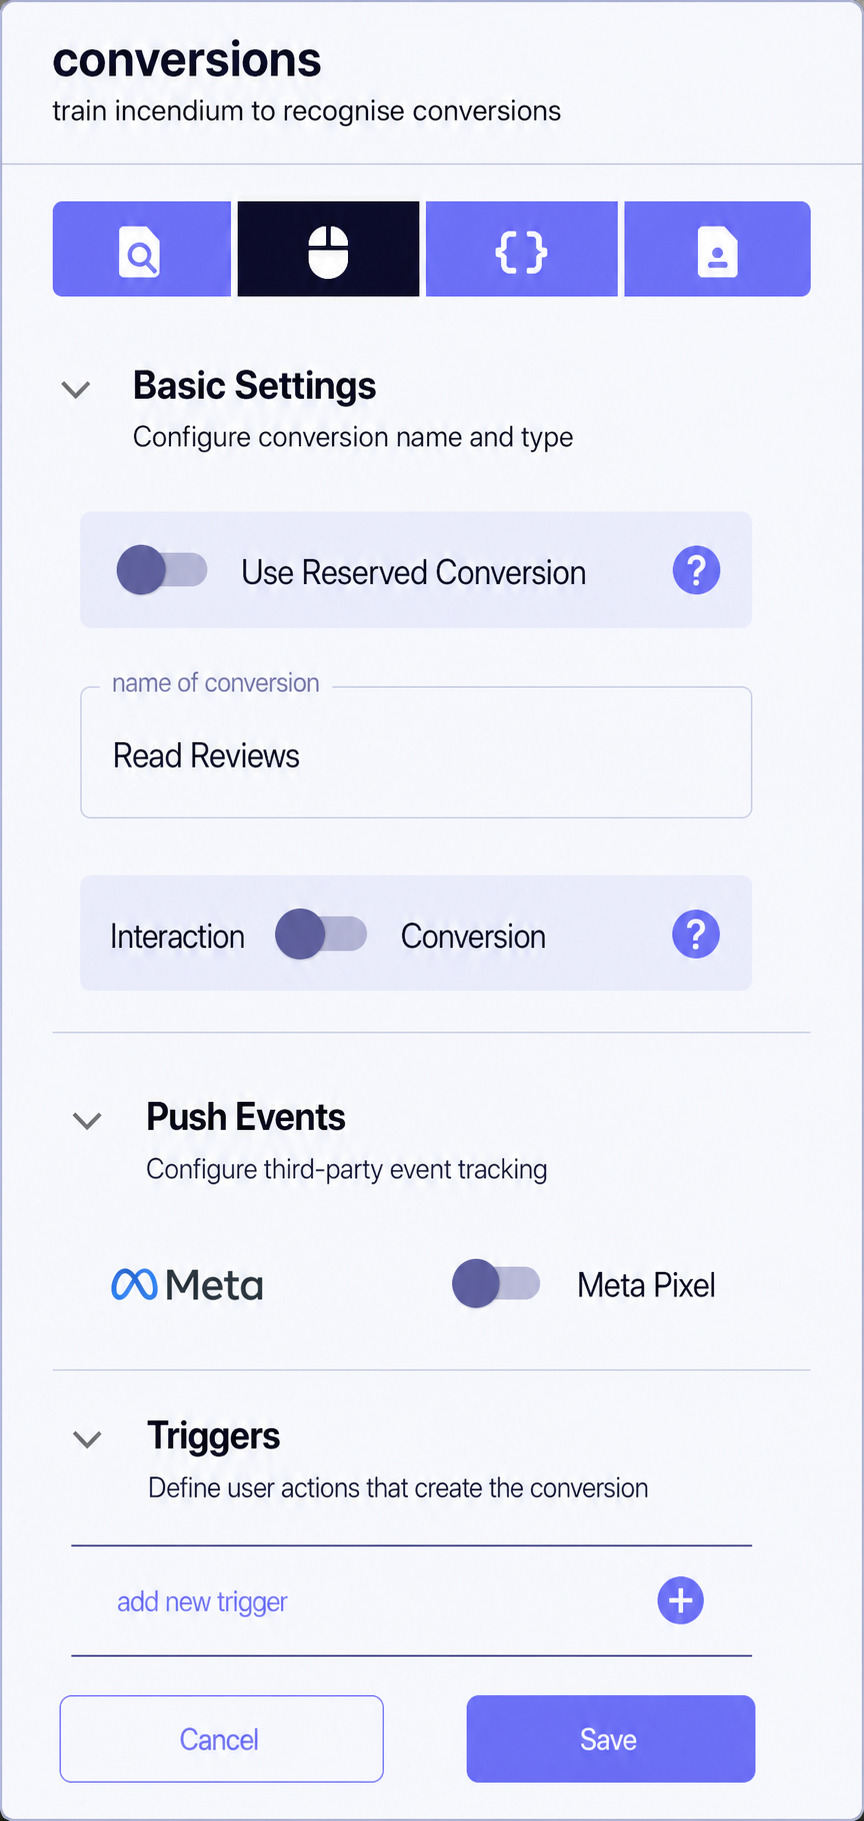
Confirm the name, whether the event is an Interaction or Conversion, and whether it should use a Reserved Conversion.
Enable Meta Pixel only for a meaningful, correctly configured event. Check that another integration is not already sending the same event.
Add the website action that creates the event. Existing triggers can be edited or removed when the page implementation changes.
Save stores the Location-level setup. Cancel leaves the current changes unapplied.
Configure a trigger
A trigger can target an element by selector or by visible element text. When selecting from the page preview, decide whether the chosen selector should be unique or may be repeated. Use a stable selector where possible; button text and generated class names are more likely to change.
Click triggers suit buttons, links and other direct actions. A time-on-element trigger can represent meaningful exposure when a visitor remains on a selected element for the configured duration. Use the latter deliberately: time spent near an element is evidence of engagement, not proof of completion.
Offline completion
In a trigger's Advanced Settings, track offline assigns a key that can later be used to close the Conversion and assign revenue. This is useful when an online enquiry becomes a qualified lead or sale away from the website, particularly in B2B journeys.
Track and control forms
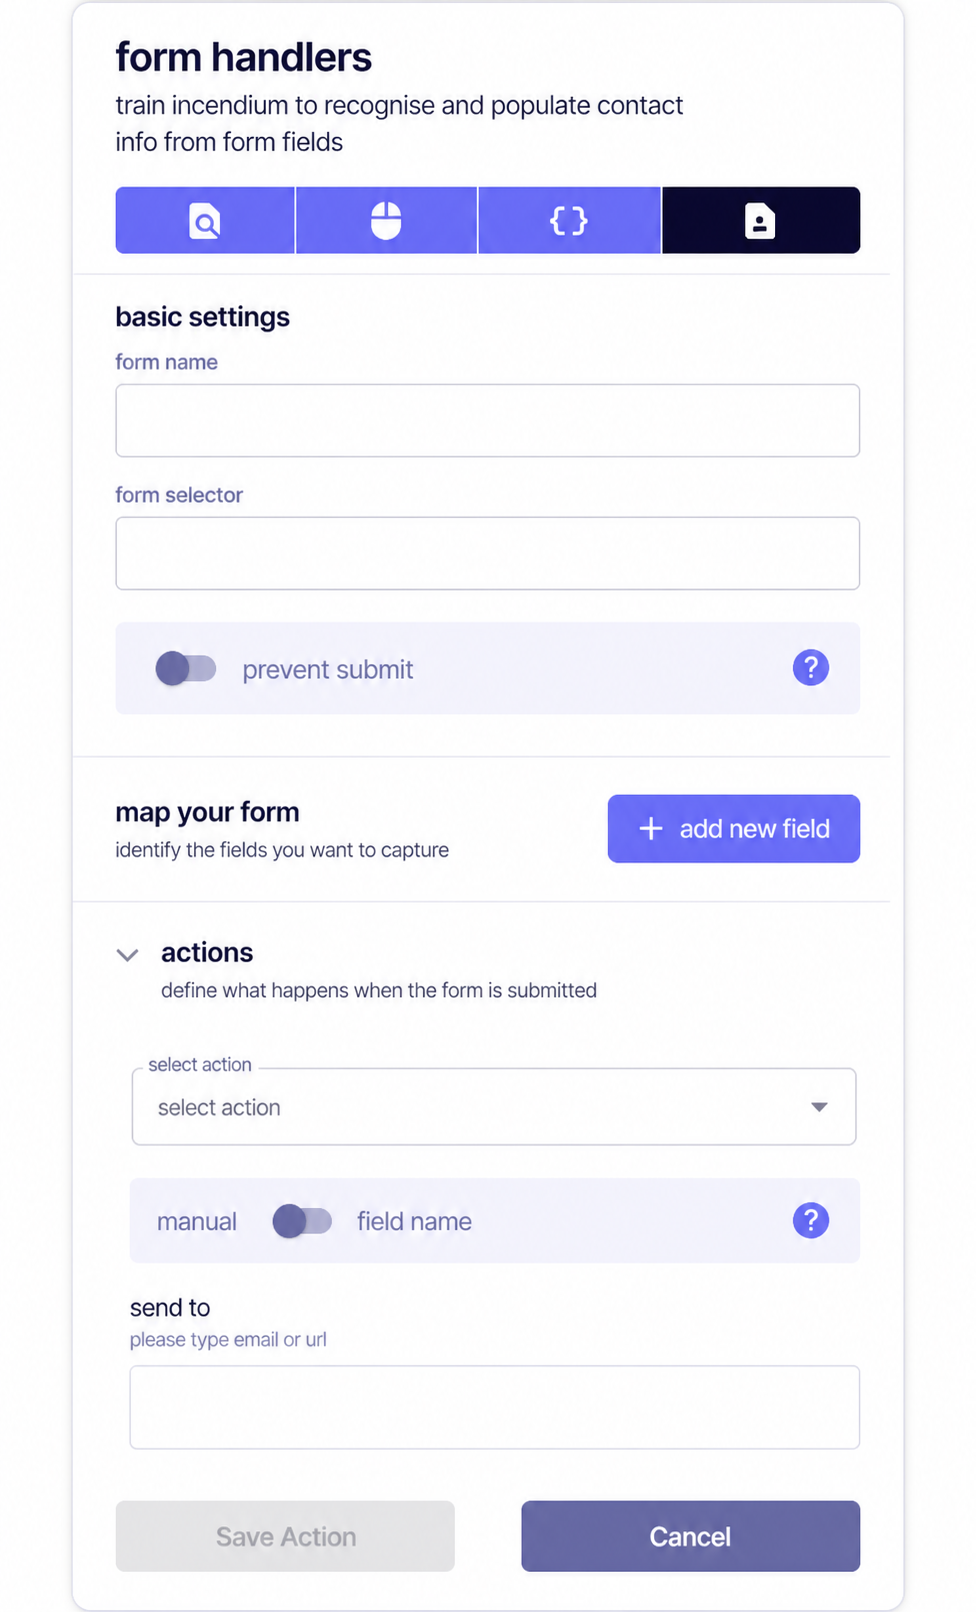
Form handling is configured from the Form Handlers mode within Tag Your Location. It complements a Conversion definition when a form submission is also a primary business outcome.
Select the form
Name the form and choose its selector from the page preview. Select a selector that identifies the intended form without matching unrelated forms on the same template.
Decide whether to prevent the default submit
prevent submit gives Incendium control of the journey after submission instead of returning the visitor to the website's default flow. Leave it off unless the configured Incendium actions are intended to replace that behaviour.
Map the required fields
Add each field, choose its input type and map it to the appropriate contact information. Capture only the information needed for the stated purpose; do not map sensitive values.
Add submission actions
Choose the action and whether its destination is entered manually or taken from a mapped field. Check email and URL destinations carefully before saving.
If submission is a primary outcome, attach the appropriate Conversion to the Location and test that the form handler completes its action while the Conversion fires once.
Maintain reliable conversion data
- Test the exact visitor action after saving the Location-level trigger.
- Confirm the correct event fires once, with the intended Conversion or Interaction classification.
- Recheck selectors after theme, component or form changes.
- Review definitions with no recent Last Fired value before deleting them.
- Avoid attaching broad triggers to several Locations unless each match represents the same outcome.
- Check browser consent behaviour and any Meta event delivery separately from Incendium's own event record.